Automating Hardware Deployment — Look Ma, No Hands!
Written during my internship at Thinkst, and originally published on their blog.
My project as an intern with Thinkst has been to develop a pipeline for deploying Canary images to Raspberry Pi devices for testing purposes. This blog aims to illuminate the details of the project.
At the very start of the internship, I was posed with the question “What’s so hard about hardware testing?” Essentially, the task is to translate manual hardware deployment and testing procedures into an automated pipeline. It is peculiar that certain tasks, easy for a human, are hard for a machine to accomplish. Similarly, the task of flashing a Canary image (manually very easy) becomes difficult to accomplish in an automated manner. Flashing is an important step in the hardware deployment process, and it poses unique challenges.
Background: The Core Problem
Canary Hardware can be mimicked using Raspberry Pi 3B and 5’s, hence these devices are particularly of interest in fulfilling the role of a “Device under Test” (DUT). Canary images (disk images) are a byte-by-byte representation of an entire storage device. All the software needed for a Canary hardware device to function resides in such an image.
However, Canary images and the software that resides in them require testing during development. To flash a new image for testing, a “Device under Test” (DUT) can’t overwrite the storage device on which its current operating system is running. Proceeding to do so would crash the OS, and the flashing operation would fail. Raspberry Pis only have a single storage device, an SD card slot, from which their operating system runs. How do you manage to flash the singular storage device that a device is running from in an automated fashion? This is the core problem that makes it difficult to develop a pipeline for deploying Canary images to Raspberry Pi devices. Switching between two different OS versions requires two different storage devices. However, a Raspberry Pi only has one.
There are incentives for solving the problem. If the automated flashing process is achieved, then it can be integrated into the CI/CD pipeline. This allows hardware tests to be integrated with the development of nightly builds of Canary images. Naturally, this leads to Thinkst Engineers in spotting problems and bugs much earlier in the development process. Catching a bug earlier would prevent a domino effect of potential problems due to the bug. A stronger incentive is that Canary tests can take up to a full day. The automated flashing process can be modified and extended to run the full test suite in parallel, which reduces the overall time it takes to test canaries.
Planning: Potential Candidate Solutions
In helping me get started, I received a project brief which contained the result of all the planning (I believe a whole years worth) done by the company prior to my arrival at Thinkst. This greatly helped and accelerated the progress of the project. Taking the prior research into account, my approach in tackling this project is a mixture of planning and hand-on practice. The starting point is to generate a list of candidate solutions, which then can be iteratively prototyped and explored hands-on.
During my research, I encountered a variety of booting methods. USB booting, Network (PXE) booting and Dual booting – different OS’s on separate partitions. Another promising solution is to use SD Card Multiplexers, which can directly automate the manual transferring of SD cards during the traditional flashing process. However, the list is filtered down to PXE booting and SD Card Multiplexers. Dual booting isn’t supported by the firmware on Raspberry Pi devices – it can’t choose which partition to load the OS from. USB booting offers a simple deployment path. However, PXE booting extends upon this functionality and is more useful.
Both candidate solutions, Network (PXE) booting and SD Card Multiplexers, can deploy an image to an SD card, but they are accomplished in different ways. Network booting can flash an image over a network. While an SD Card Multiplexers flashes an image with a multiplexer device acting as an intermediary. This sounds all good. However, how can this be accomplished?
SD Card Multiplexers
The idea behind SD Card Multiplexers is simple. It functions as a switch which connects the SD card to either the “Host” or “DUT”. An SD Card Multiplexer directly automates the manual SD card transfer between two devices. SD Card multiplexers typically have 3 I/O slots: (1) SD Card Reader Slot (Connects the SD Card to be multiplexed). (2) SD Card Head (Connects to the Device Under Test). (3) USB port (Connects to the Host)
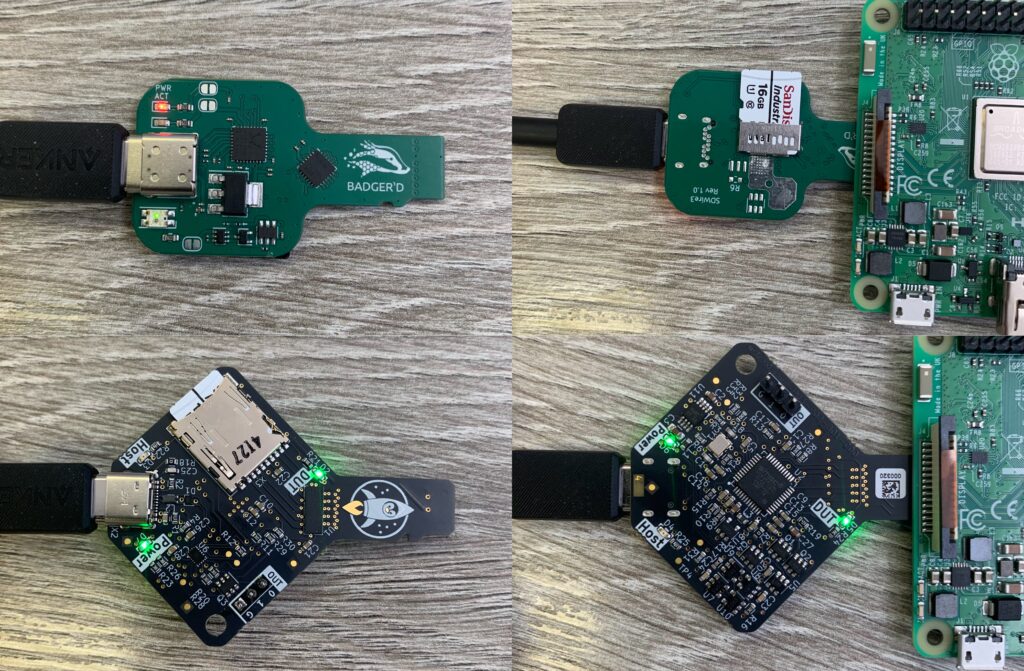
The flashing process is as follows:
- The Host receives a request to flash a new test image to a “Device Under Test” (DUT).
- The Host uses the multiplexer controller to switch the SD card connection to the “Host” side.
- The Host flashes the new Canary image to the SD Card
- The Host uses the multiplexer controller to switch the SD card connection back to the “DUT” side.
- The Host sends a signal to reboot the DUT
- The DUT now reboots into the newly flashed test image
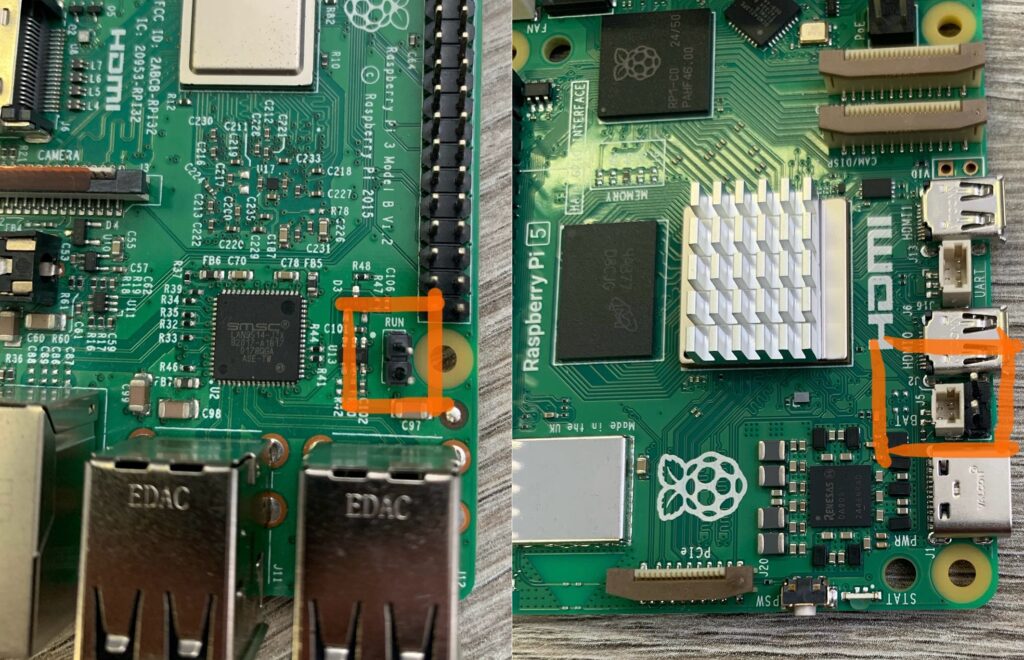
There is a problem that is encountered in this process. Similar to the core problem, as described before, the OS will crash if it is suddenly disconnected from its storage device. However, the OS crashing isn’t a train wreck, as it is possible to automatically hard reboot a Raspberry Pi via GPIO pins. Soldering is required to attach header pins to allow rebooting via the GPIO pins. Header pins need to be attached to the RUN headers on Raspberry Pi 3B, and similarly, attach header pins to J2 headers on a Raspberry Pi 5.
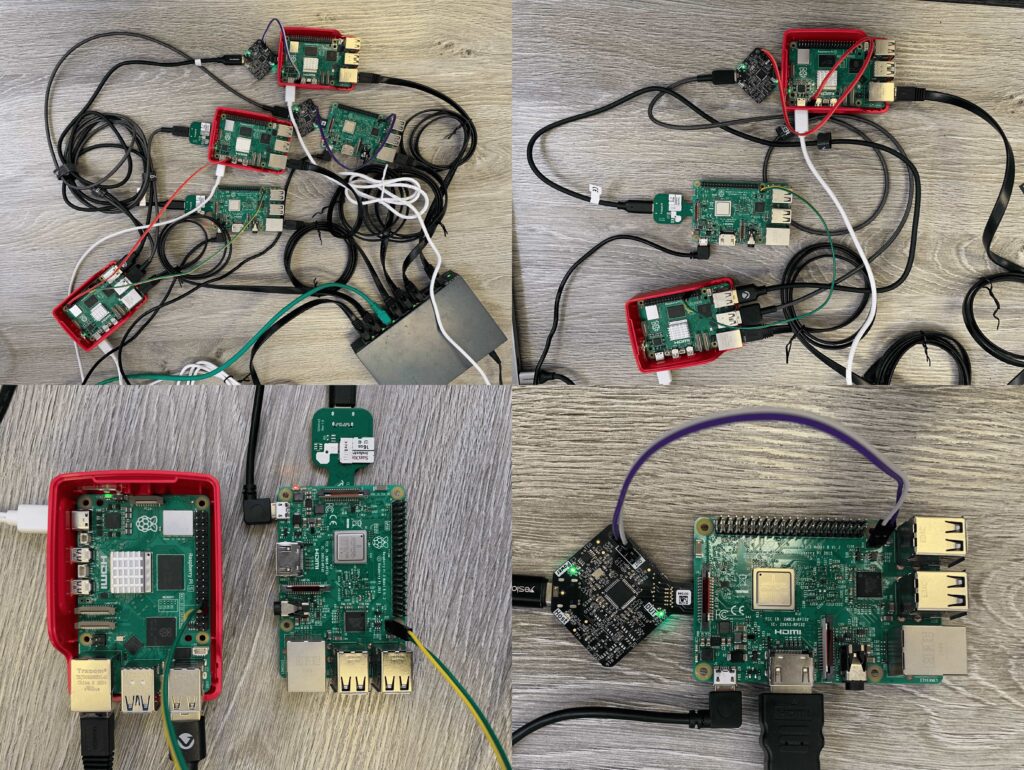
The final setup is shown in the image below. The full set-up adds another two Pi’s, however, it becomes very messy.
Faulty SDWire3 Hardware Problems
A performance metric of interest is the flashing/writing speed. For comparison, a Thunderbolt USB-C Hub flashes an SD Card at 62 MB/s – roughly 2m 20s spent flashing a Canary image.
Network booting is constrained by the speed of the respective Raspberry Pi’s SD card slot and its network interface. This is not a problem with the Pi 5, where it’s flashing speed is 23 MB/s and translates to roughly 6m 20s. It is a problem with the Pi 3B, as its flashing speed is 7.8 MB/s, and it’s ethernet interface’s speed is capped at 12.5 MB/s. This translates to roughly 20 mins spent on the flashing operation.
The potential advantage of SD Card Multiplexers is demonstrated by SDWire3. SDWire3 supports USB 3.0 speeds and can flash an SD card at 49MB/s – roughly 3 minutes. However, the hardware is faulty. When it uses USB 3.0, the switching functionality does not work and is also not compatible with SDR104 speeds used by Raspberry Pi 5. This results in USB 2.0 speeds being used as a fall back, and the speed decreases to 19.3MB/s – roughly 7m 57s.
Network (PXE) Booting
PXE is the standard that allows a device to boot an operating system from the network. Hence, the whole process is called PXE or Network booting. What makes this technology powerful is how flexible the operating systems can be: Recovery OS, OS mounted on remote drives, OS installer and our OS of interest RAM-only OS.
Typical OS’s requires an external storage medium in conjunction to a device’s RAM. RAM-only OS’s are very interesting as they can independently reside in RAM once loaded. Additionally, they are key to solving our core problem. As the OS can run independently from RAM, flashing our singular storage device (SD card) can be done without the OS crashing. List of RAM only OS’s
Typical OS’s requires an external storage medium in conjunction to a device’s RAM. RAM-only OS’s are very interesting as they can independently reside in RAM once loaded. Additionally, they are key to solving our core problem. As the OS can run independently from RAM, flashing our singular storage device (SD card) can be done without the OS crashing.
PXE booting facilitates loading a RAM-only OS to a PXE (DUT) Client’s RAM. This allows the DUT to boot into the RAM-only OS. The DUT can now download our Canary image into RAM and flash it to its local storage. What to do if a Canary image is too big for a device’s RAM? The downloading operation can be piped to the flashing operation, bypassing the need for temporarily storing the whole Canary image into RAM.
Details: Loading a RAM-only OS
A PXE Server consists of multiple servers working together to allow a PXE Client to network boot. The PXE Server consists of a DHCP Proxy Server, TFTP Server and HTTP Server.
Typical PXE Flashing process:
- A PXE Client Device starts the network booting process by sending a broadcast request to the network’s DHCP server.
- The DHCP server would provide an IP address, and the DHCP Proxy would provide an IP address for the TFTP Server.
- The PXE Client would request the necessary files to boot into the kernel from the TFTP Server.
- Kernel is loaded and in control. The kernel requests additional OS files, including a custom overlay, from the HTTP Server
- Custom flashing script is run on start-up, flashes the local storage device (SD Card), and reboots into the newly flashed storage device.
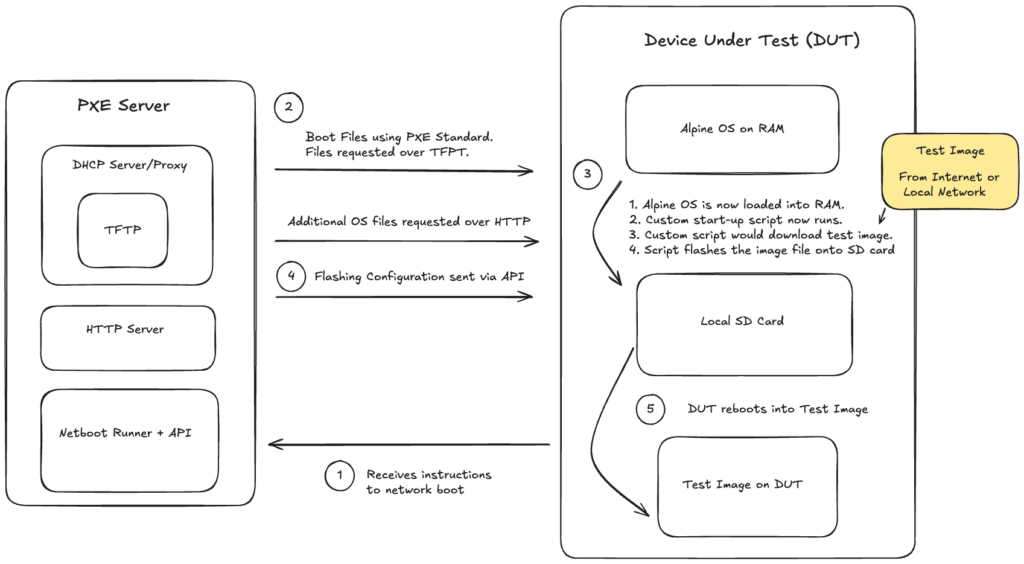
Alpine OS, for a RAM-only OS, was picked as it has a robust and active community. It is commonly used as a base for Docker images, and it’s very small at around 100MB. Additionally, to automate the flashing process, we need a custom overlay (apkovl) file to run a startup script that flashes the Raspberry Pi’s SD Card.
Configuring the PXE Server to serve Alpine OS to PXE clients requires splitting up the OS, normally present in the boot partition, into the right locations. The files of interest are “config.txt” and “cmdline.txt”, which respectively describe hardware settings and kernel parameters. More information is detailed in the project’s documentation.
Completing the Pipeline: Runner it down
To handle dynamic flashing requests, a PXE (Network) Runner is created. The role of the runner is similar to Github Runner. They take input and execute jobs / tasks in a pipeline. The PXE runner exposes an API which allows dynamic specification of image and device to be flashed.
The runner helps complete the whole image deployment pipeline. It instructs a PXE-enabled device to network boot via SSH. This is requested via an HTTP POST Request.
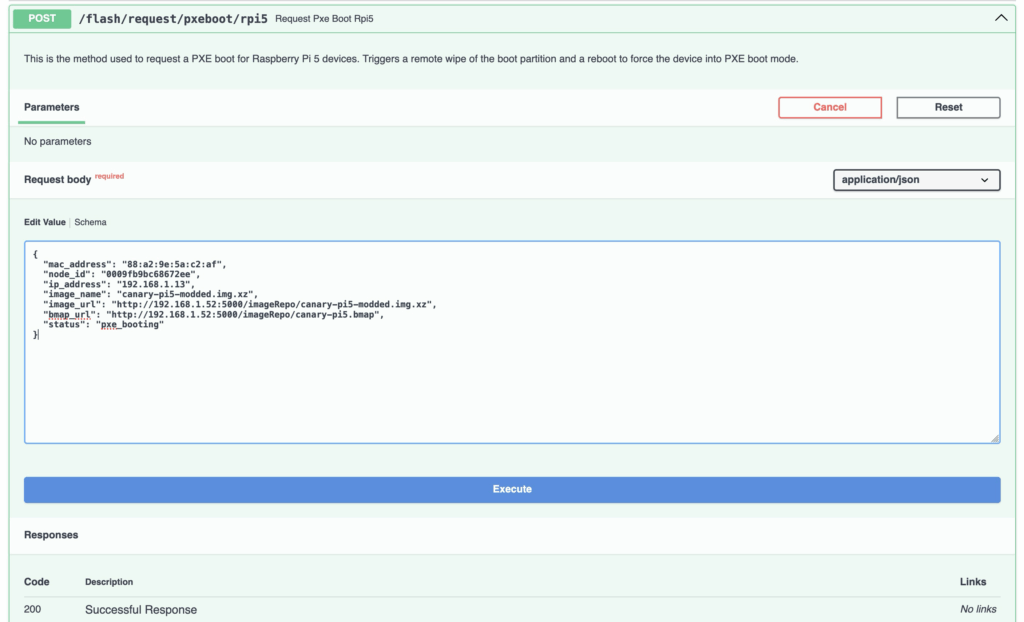
If we look at our PXE server logs, it tells us that the specified PXE client device is now network booting and how the client interacts with different services.
pxe-dnsmasq  | dnsmasq-dhcp[1]: 4141337700 available DHCP subnet: 192.168.1.0/255.255.255.0
pxe-dnsmasq  | dnsmasq-dhcp[1]: 4141337700 vendor class: PXEClient:Arch:00000:UNDI:002001
pxe-dnsmasq  | dnsmasq-tftp[1]: file /pxe/tftpboot/c68672ee/config.txt not found for 192.168.1.66
pxe-dnsmasq  | dnsmasq-tftp[1]: sent /pxe/tftpboot/config.txt to 192.168.1.66
pxe-dnsmasq  | dnsmasq-tftp[1]: file /pxe/tftpboot/pieeprom.sig not found for 192.168.1.66
pxe-dnsmasq  | dnsmasq-tftp[1]: sent /pxe/tftpboot/bcm2712-rpi-5-b.dtb to 192.168.1.66
pxe-dnsmasq  | dnsmasq-tftp[1]: sent /pxe/tftpboot/config.txt to 192.168.1.66
pxe-dnsmasq  | dnsmasq-tftp[1]: sent /pxe/tftpboot/config.txt to 192.168.1.66
pxe-dnsmasq  | dnsmasq-tftp[1]: error 0 Early terminate received from 192.168.1.66
pxe-dnsmasq  | dnsmasq-tftp[1]: sent /pxe/tftpboot/alpine/vmlinuz-rpi to 192.168.1.66
pxe-dnsmasq  | dnsmasq-tftp[1]: sent /pxe/tftpboot/alpine/initramfs-rpi to 192.168.1.66
pxe-dnsmasq  | dnsmasq-tftp[1]: sent /pxe/tftpboot/bcm2712-rpi-5-b.dtb to 192.168.1.66
pxe-dnsmasq  | dnsmasq-tftp[1]: sent /pxe/tftpboot/alpine/overlays/overlay_map.dtb to 192.168.1.66
pxe-dnsmasq  | dnsmasq-tftp[1]: sent /pxe/tftpboot/alpine/overlays/bcm2712d0.dtbo to 192.168.1.66
pxe-dnsmasq  | dnsmasq-tftp[1]: sent /pxe/tftpboot/config.txt to 192.168.1.66
pxe-dnsmasq  | dnsmasq-tftp[1]: sent /pxe/tftpboot/cmdline.txt to 192.168.1.66
pxe-dnsmasq  | dnsmasq-tftp[1]: file /pxe/tftpboot/armstub8-2712.bin not found for 192.168.1.66
pxe-dnsmasq  | dnsmasq-tftp[1]: sent /pxe/tftpboot/alpine/vmlinuz-rpi to 192.168.1.66
pxe-dnsmasq  | dnsmasq-dhcp[1]: 1858184014 available DHCP subnet: 192.168.1.0/255.255.255.0
pxe-dnsmasq  | dnsmasq-dhcp[1]: 1858184014 vendor class: udhcp 1.37.0
pxe-dnsmasq  | dnsmasq-dhcp[1]: 1858184014 available DHCP subnet: 192.168.1.0/255.255.255.0
pxe-dnsmasq  | dnsmasq-dhcp[1]: 1858184014 vendor class: udhcp 1.37.0
pxe-http     | 192.168.1.13 192.168.1.52:5000 - [29/Jan/2026:15:06:10 +0000] "GET /alpineOS/netboot.apkovl.tar.gz HTTP/1.1" 200 17305 "-" "Wget"
pxe-http     | 192.168.1.13 192.168.1.52:5000 - [29/Jan/2026:15:06:12 +0000] "GET /alpineOS/modloop-rpi HTTP/1.1" 200 52731904 "-" "Wget"
pxe-dnsmasq  | dnsmasq-dhcp[1]: 3018030186 available DHCP subnet: 192.168.1.0/255.255.255.0
pxe-dnsmasq  | dnsmasq-dhcp[1]: 3018030186 vendor class: udhcp 1.37.0
pxe-dnsmasq  | dnsmasq-dhcp[1]: 3018030186 client provides name: netboot
pxe-dnsmasq  | dnsmasq-dhcp[1]: 3018030186 available DHCP subnet: 192.168.1.0/255.255.255.0
pxe-dnsmasq  | dnsmasq-dhcp[1]: 3018030186 vendor class: udhcp 1.37.0
pxe-dnsmasq  | dnsmasq-dhcp[1]: 3018030186 client provides name: netboot
pxe-runner   | [API] Config request from MAC: 88:a2:9e:5a:c2:af, Node: 0009fb9bc68672ee
pxe-runner   | [API] Status Change: 0009fb9bc68672ee (flashing -> FLASHING)
pxe-runner   | INFO:     192.168.1.13:34298 - "POST /flash/client/config HTTP/1.1" 200 OK
pxe-http     | 192.168.1.13 192.168.1.52:5000 - [29/Jan/2026:15:06:24 +0000] "GET /imageRepo/canary-pi5.bmap HTTP/1.1" 200 732086 "-" "curl/8.17.0"
pxe-http     | 192.168.1.13 192.168.1.52:5000 - [29/Jan/2026:15:06:29 +0000] "GET /imageRepo/canary-pi5-modded.img.xz HTTP/1.1" 200 681294460 "-" "curl/8.17.0"
pxe-runner   | Received log upload from Node ID: 0009fb9bc68672ee with status code: 0
pxe-runner   | Successfully saved log: node_0009fb9bc68672ee_2026-01-29_15-08-03.log
After network booting and flashing its own local storage device. The runner also handles the discovery of device start-up after flashing via mDNS.
pxe-runner   | Status 0 received. Queuing mDNS scan...
pxe-runner   | INFO:     192.168.1.13:44818 - "POST /flash/client/upload/log HTTP/1.1" 200 OK
pxe-runner   | [*] Starting mDNS scan for 120 seconds...
pxe-runner   | [*] Looking for MAC: 88:a2:9e:5a:c2:af excluding IP 1.1.1.1
pxe-runner   | [*] Listening for devices matching: ['srv01']...
pxe-runner   | [+] Service added: pxe-server [88:a2:9e:5a:c1:9d]._workstation._tcp.local.
pxe-runner   | [+] Service added: pxe-server [00:00:00:00:00:00]._workstation._tcp.local.
pxe-runner   | [*] Update event received for pxe-server [88:a2:9e:5a:c1:9d]._workstation._tcp.local.
pxe-runner   | [+] Service added: pxe-server [c2:87:83:58:67:dc]._workstation._tcp.local.
pxe-runner   | [*] Update event received for pxe-server [88:a2:9e:5a:c1:9d]._workstation._tcp.local.
pxe-runner   | [*] Update event received for pxe-server [00:00:00:00:00:00]._workstation._tcp.local.
pxe-runner   | [+] Service added: SRV01 [88:a2:9e:5a:c2:af]._workstation._tcp.local.
pxe-dnsmasq  | dnsmasq-dhcp[1]: 585076302 available DHCP subnet: 192.168.1.0/255.255.255.0
pxe-dnsmasq  | dnsmasq-dhcp[1]: 585076302 client provides name: SRV01
pxe-dnsmasq  | dnsmasq-dhcp[1]: 585076302 available DHCP subnet: 192.168.1.0/255.255.255.0
pxe-dnsmasq  | dnsmasq-dhcp[1]: 585076302 client provides name: SRV01
pxe-runner   | [*] Ignored SRV01.local: Only has 1.1.1.1 or no IP.
pxe-runner   | [*] Update event received for SRV01 [88:a2:9e:5a:c2:af]._workstation._tcp.local.
pxe-runner   | [*] Ignored SRV01.local: Only has 1.1.1.1 or no IP.
pxe-runner   | [*] Update event received for SRV01 [88:a2:9e:5a:c2:af]._workstation._tcp.local.
pxe-runner   | [SUCCESS] Target Found: SRV01.local | IP: 192.168.1.13 | MAC: 88:a2:9e:5a:c2:af
pxe-runner   | Stopping scan, valid device found.
pxe-runner   |
pxe-runner   | [*] mDNS scan finished/closed.
Finally, it handles linking the newly flashed device to a Canary Console. Now being linked to a console, testing can occur. However, that’s currently out of the scope of this project.
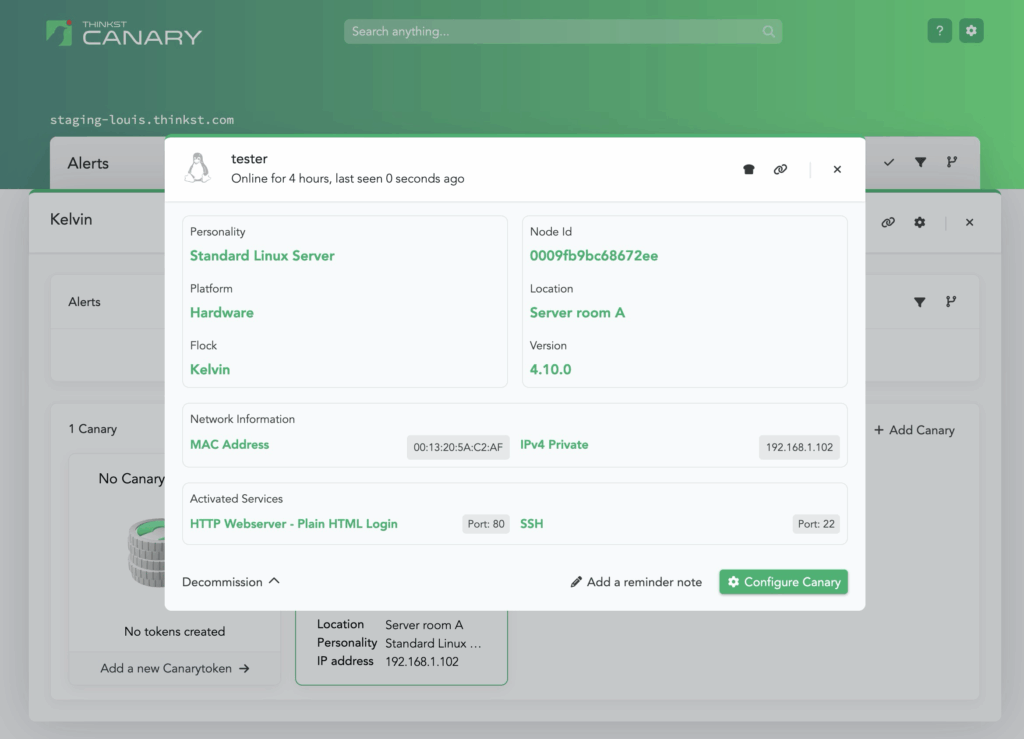
pxe-runner   | [*] Triggering config check on 192.168.1.13...
pxe-runner   | Using MAC Suffix: 5a%3Ac2%3Aaf
pxe-runner   | [*] Step 1: Pushing configuration to local device at 192.168.1.13...
pxe-runner   | [+] Success: Received registration blob (11928 bytes).
pxe-runner   | [*] Step 2: Authenticating with Canary Console (https://338edead.canary.tools)...
pxe-runner   | {
pxe-runner   |   "redirect_to": "/",
pxe-runner   |   "result": "success"
pxe-runner   | }
pxe-runner   |
pxe-runner   | [*] Step 3: Acquiring CSRF tokens for API operations...
pxe-runner   | [*] Step 4: Registering the device hardware with the Console...
pxe-runner   | [+] Success: Device registered with Node ID: 0009fb9bc68672ee
pxe-runner   | [*] Step 5: Commissioning device into Flock: flock:7ac622e57afe21a1e2274c9d694dcc56...
pxe-runner   | [+] Success: Device commissioned and assigned to flock.
pxe-runner   | [*] Step 6: Finalizing handshake with local device...
pxe-runner   | [*] Command Sent: Rebooting device to apply changes...
pxe-runner   |
pxe-runner   | [!] Setup Complete. The device should appear online shortly.
PiKVM: Remote Access
PiKVM can provide remote access to a connected device over the network. This is useful for remote debugging of a DUT. They also expose a REST API, so you can programmatically send actions for the PiKVM to perform. It can also perform OCR and attach a virtual mass storage device.
The PiKVM runs on a Raspberry Pi 4 and uses an HDMI to CSI adapter and a USB Cable to capture video input and emulate mouse and keyboard signals. If the hardware is all connected correctly, then it is a very painless setup process. Simply flash the correct PiKVM image to an SD card and boot from the Pi 4. The PiKVM runs on top of Arch Linux, and it automatically configures and exposes the PiKVM at its IP address. By default, the PiKVM’s memory is mounted as read-only, which prevents accidental changes.
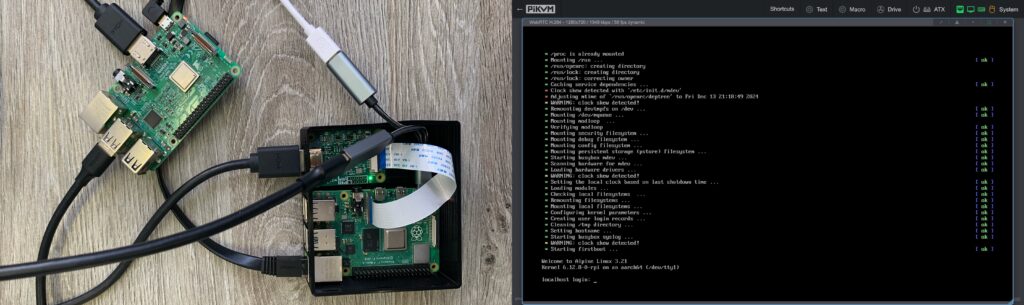
The PiKVM’s REST API can be utilized to instruct a DUT to network boot without SSH – The PXE Runner uses SSH to accomplish this. This is useful as production Canaries do not have SSH enabled. Feedback on if command executed successfully can be obtain via OCR or utilizing keyboard LED states by sending and reading custom LED states. In fact, if a screen is not needed, then a Raspberry Pi Pico W can instead be used.
Reflection
Reflecting back, the internship was really fun and an invaluable time. Adjusting to a new environment is always hard at first. Yet, much support was given. Louis, my mentor, graciously flew down from Pretoria to the Cape Town Thinkst office during my internship for a productive two weeks. If hardware was missing, then my mentor would promptly have it ordered.
Admittedly, I did not ask enough questions about problems I encountered, but the few questions that I did ask were met with unexpected enthusiasm and attention. It was at these moments that work felt valued and motivating.
There were also a lot of small side quests, which I learnt a lot from and I didn’t get to talk about them in this blog. Learning to solder was very fun. 3D printing takes long time, but nevertheless an exciting activity.
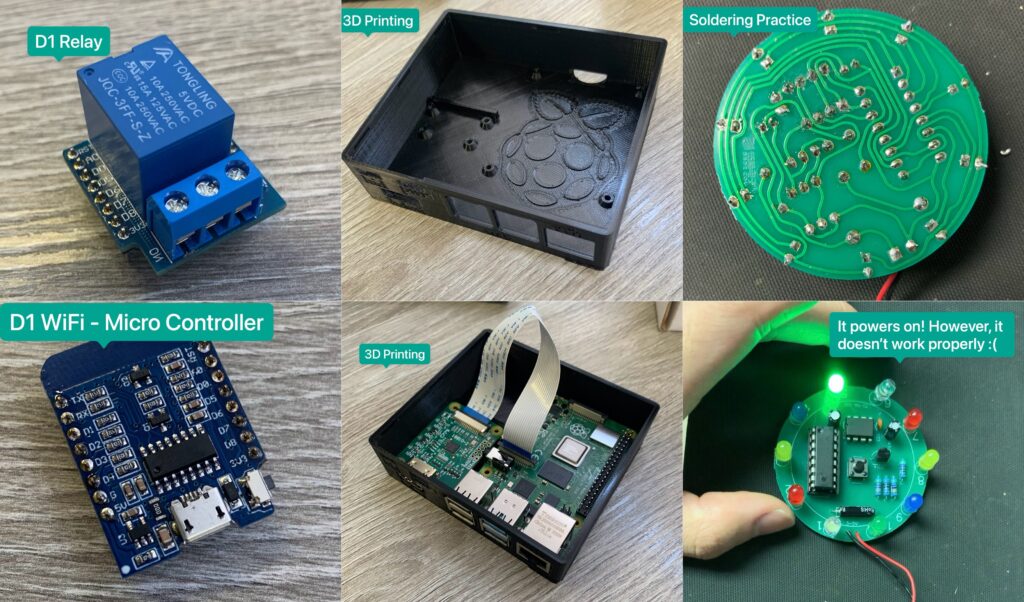
For the bad… I clearly don’t have the best luck with hardware. I somehow bricked a Raspberry Pi 3B and some GPIO pins on the PXE Server while experimenting with rebooting Pi’s with GPIO pins. I can be thankful that nothing was short-circuiting, giving off smoke and becoming a firehazard – I prefer not to become known as the intern who burnt down the Thinkst office.
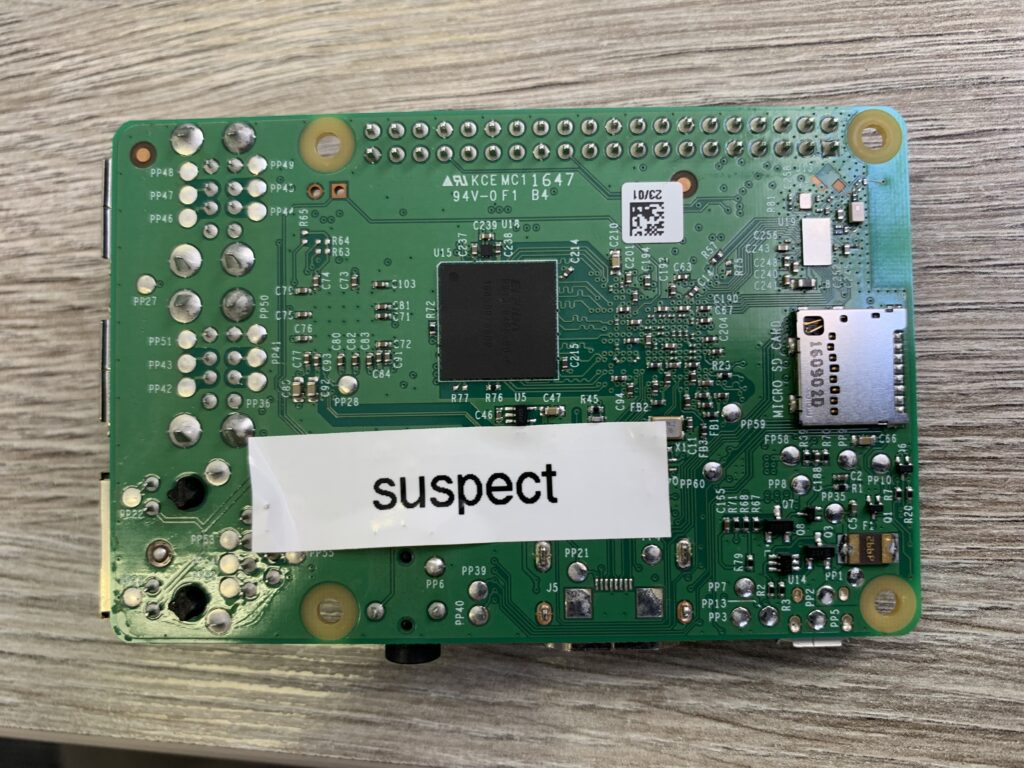
Also staying in the office for too long past the intended 5pm clearly isn’t sustainable. However, when you’re having fun, the hours do seem to fly by too fast.
Conclusion
What’s so hard about hardware testing? For this project, the difficulty doesn’t lie in the software itself, but in the constraints that hardware imposes. Hardware can’t be changed as easily as software. The skills to work with hardware are different from software, yet they are fundamentally related.
This project has led to unexpected destinations. For context, I had minimal experience with hardware before this internship. However, I dove headfirst into the unfamiliar territory, and I’m glad that I did. They say getting started is the most difficult part. Hence, I believe I’ll work on hardware projects in the future.